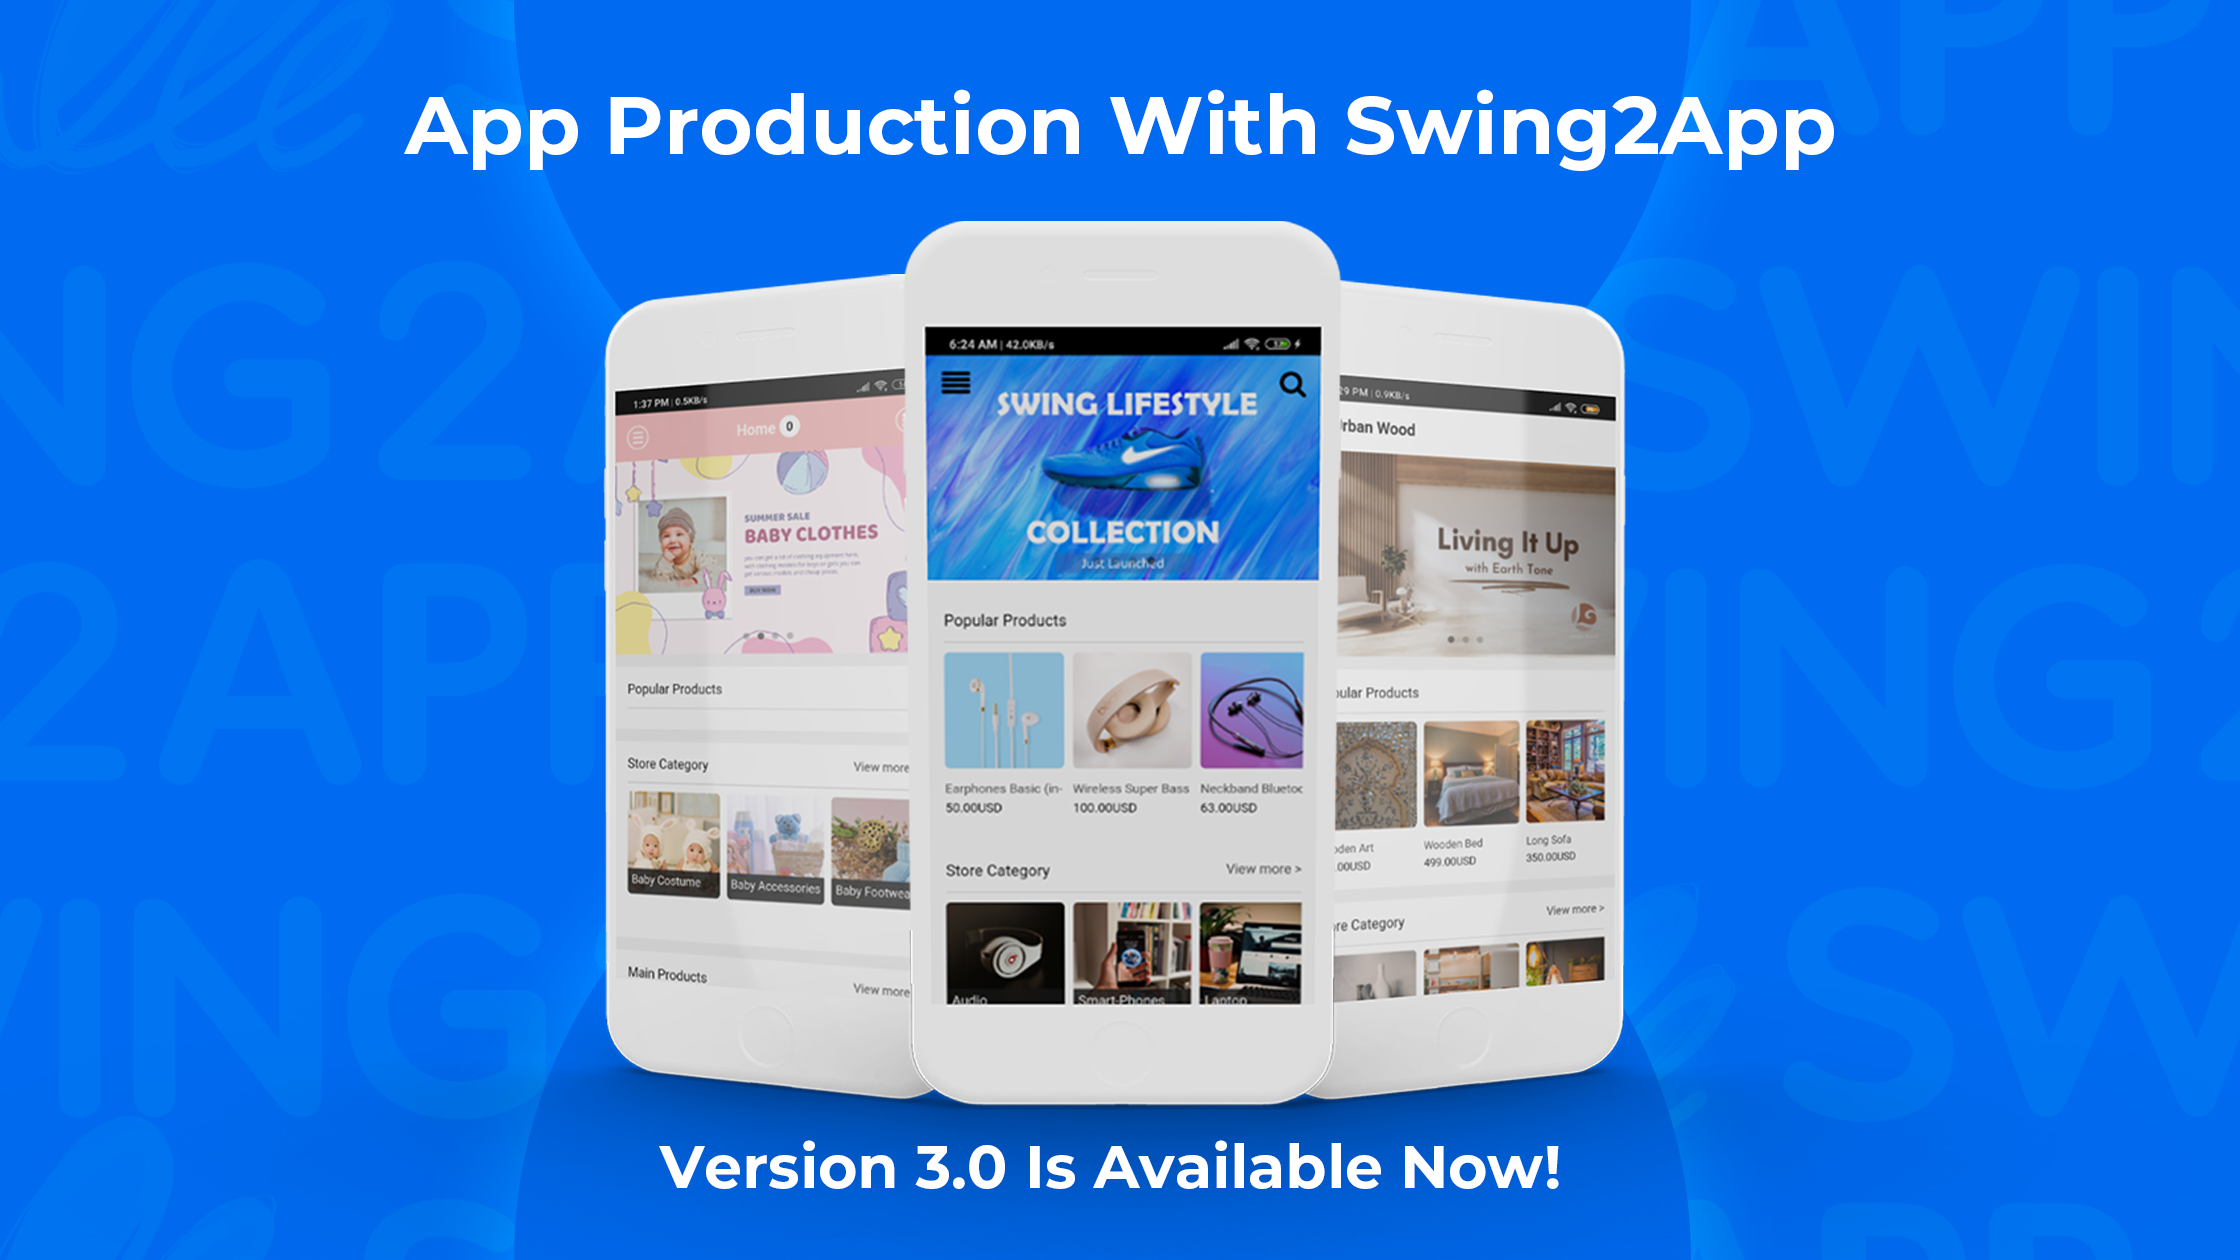
App production with Swing2App version 3.0 is available now!
Greetings to all no-code developers. We have launched the latest version of the Swing2App Maker V3.
We would like to express our gratitude to all users who have been waiting for the opening.
We have made our platform more user-friendly and added some extra features too!
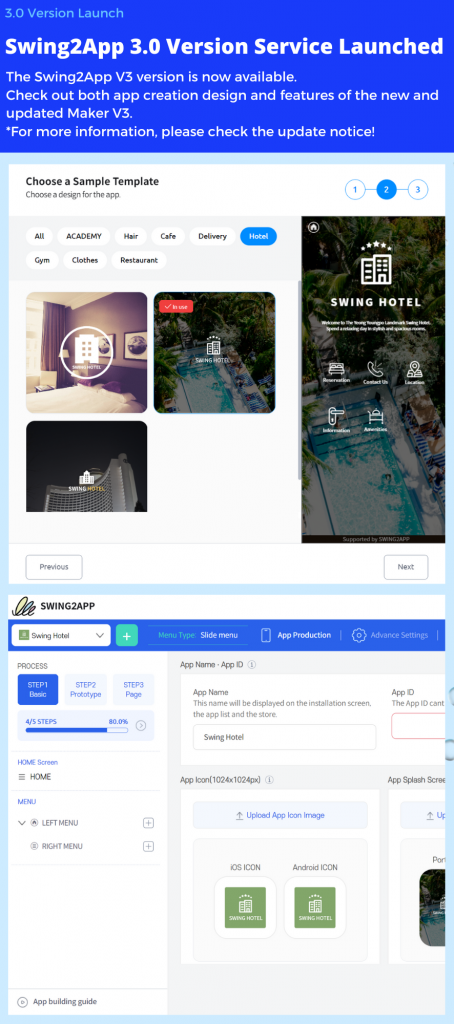
In this post we will explain how to use the Swing2App Maker V3 to create the best no-code apps.
Let’s get started!
How can I use the updated Swing2App Maker V3?
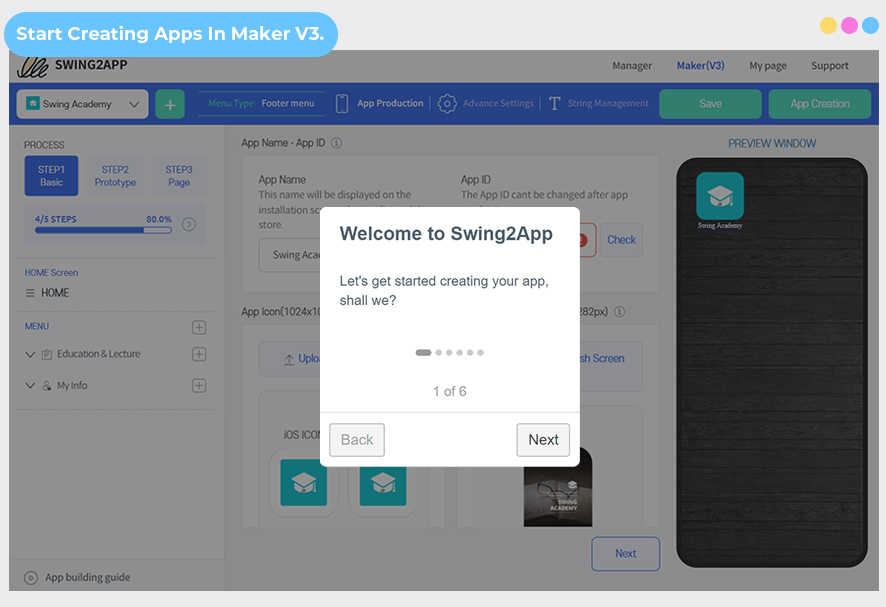
When you log in to the Swing2App homepage, the V3 App Creation Wizard Guide will pop up immediately.
You will see the latest version of the App Creation Wizard screen, where you can create your app.
After that, you can create an app by going to the top left menu [App CreationV3].
How can existing users who are using V2 use it?
1) If you are transferring an app created in V2 to V3
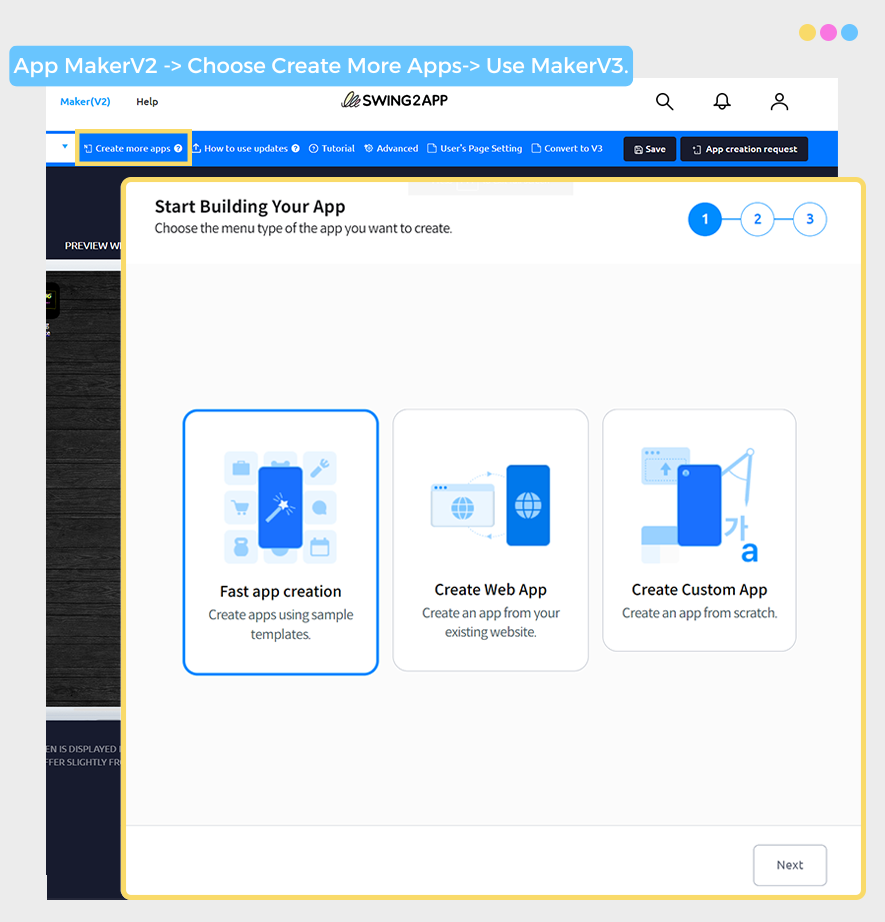
Existing users must select the [Create More Apps] button to go to the V3 screen.
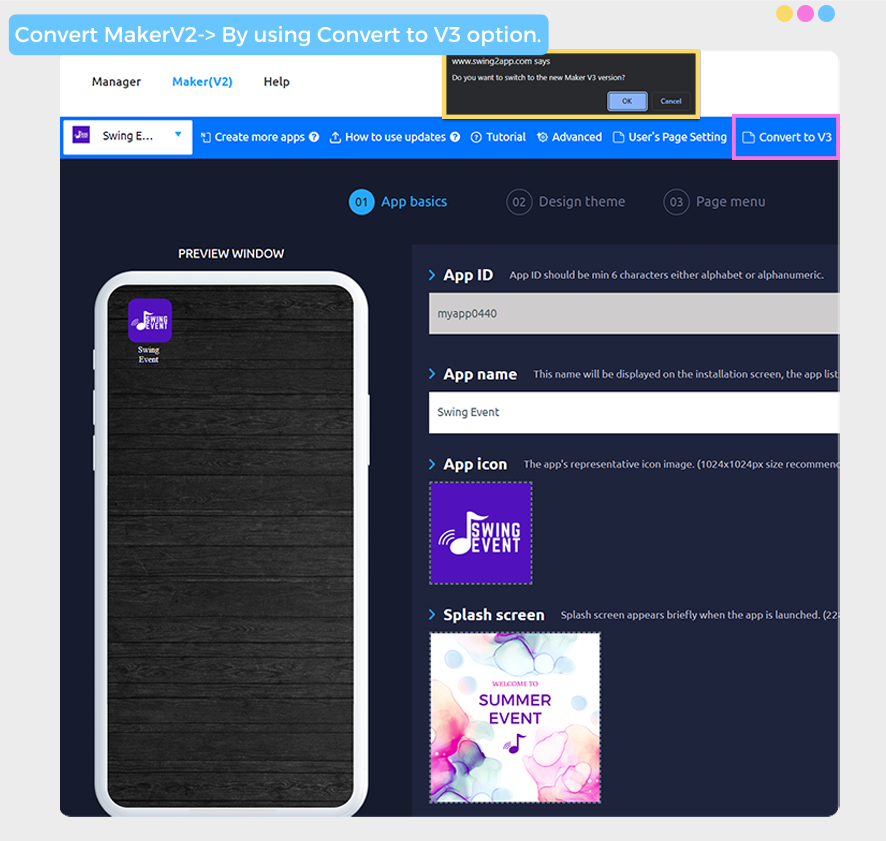
Since only the selected app is moved to the V3 version, you can edit the app again in that version by selecting the app you want to move and then converting to V3.
2) New app creation is automatically created in the V3 version.
*Important* Apps built in the existing V2 cannot be moved to V3 yet. Currently, we do not provide a version transfer button.
Please note that we will be providing a button to move to the V3 version sometime next week.
Can an app created in V2 be modified with the V3 version?
Yes, you can migrate from the V2 to the V3 version, then it can be modified and updated by overwriting it with the V3 function.
*Important* After you modify the app, you must update it. (After selecting the Create App button, you need to update the app with the latest version).
And if your app is released on the Play Store, or the App Store, you will need to update it to the newly created version of the app.
If you do not update your app on the store, existing app users and new users who download your app will only use the previous version of the app.
Is it possible to use all the functions provided in the previous V2?
The functionality offered by the V2 maker will remain the same as the V3 maker.
Only new features are added, and existing features have been moved, as they are, without any interruption, so you can use them without any issue.
What has been updated in the V3 version?
The no-code app creation steps, method, style, design of the App Creation Wizard, and the area in which you build apps, have all changed. In short, we have given it a complete makeover to make it easier and more user friendly than the V2 version.
We’ve also added various guides and templates to make no-code app creation the easiest it can be.
In addition, new functions required for app production have been added, allowing you to add more various options for app production.
If you are familiar with making apps via Swing2App, the V3 version is not difficult at all but rather easier than the V2 maker, so you can follow it without any issues.
That’s not all, we will be continuously working to make your no-code app development experience better day by day. So, the App creation and operation functions will be continuously updated to take your no-code development with Swing2App to the next level.
Introduction of Swing2App Maker V3 new functions
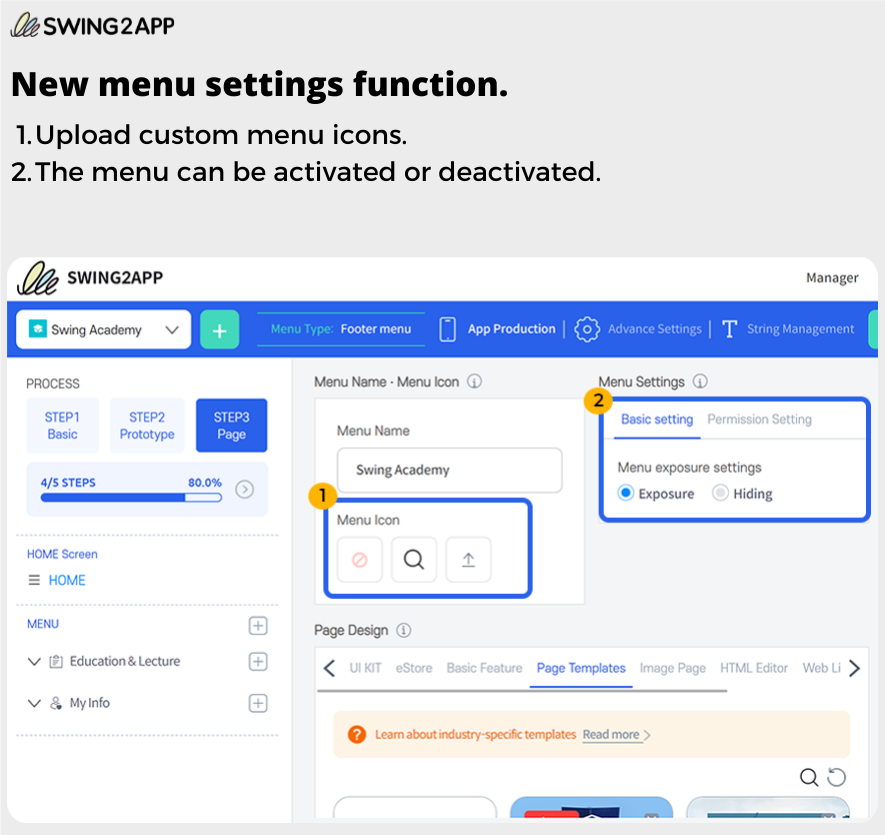
1) A function to upload a menu icon is added.
In addition to the existing icon images provided by Swing2App, if there is an icon image that users want to add, they can directly upload a file and use it as an icon in their app.
2) Menu activation and deactivation functions
If you don’t want to open the menus provided by the app to users yet! You can choose to make them invisible from the app users by selecting ‘Disable’.
This is quite helpful when you are testing new menus and categories and want to ensure that everything fits properly before actually publishing it to your users.
Administrators can only check the app creation dashboard that is being worked on. When all tasks are completed, please change to enable visibility again.
Once all the menus are enabled, they will be automatically reflected in your app!
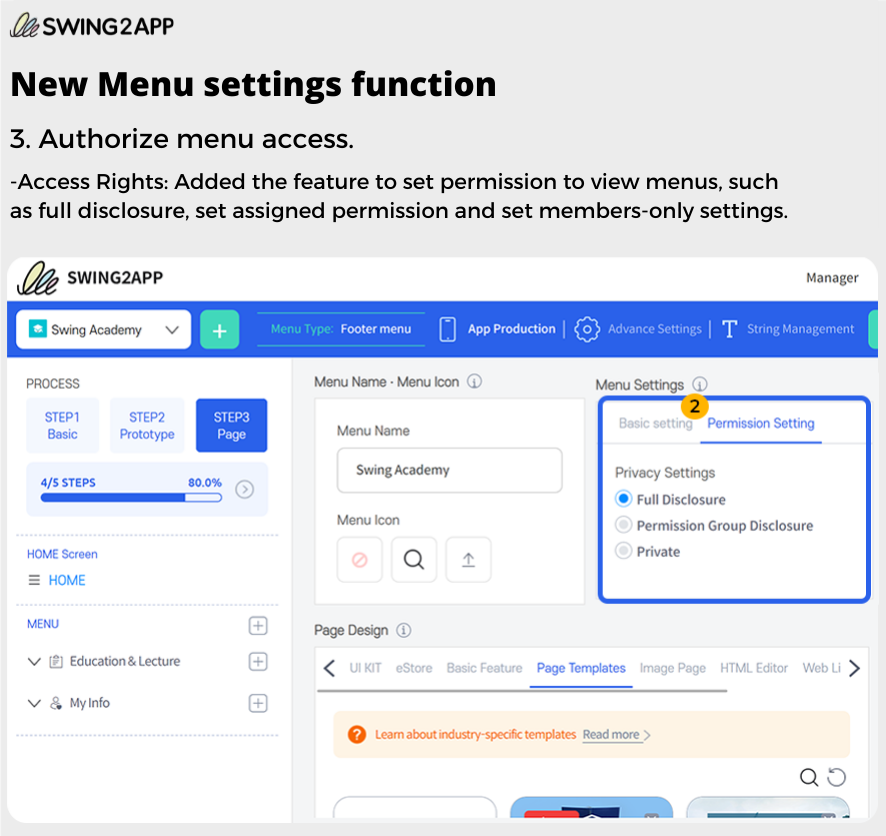
3) Improved menu authorization.
The functionality to set permissions to certain users to access the menu is also added.
You can choose whether to allow all users to view the menu applied to the app, only to members who have signed up for the app, or for them to view only specified permitted menus.
If you select Permissions, you can choose which groups you want the menus to be accessible to.
(Specified permission is a permission group, which refers to a group set by the administrator between 1 and 9 levels of permission allowance)
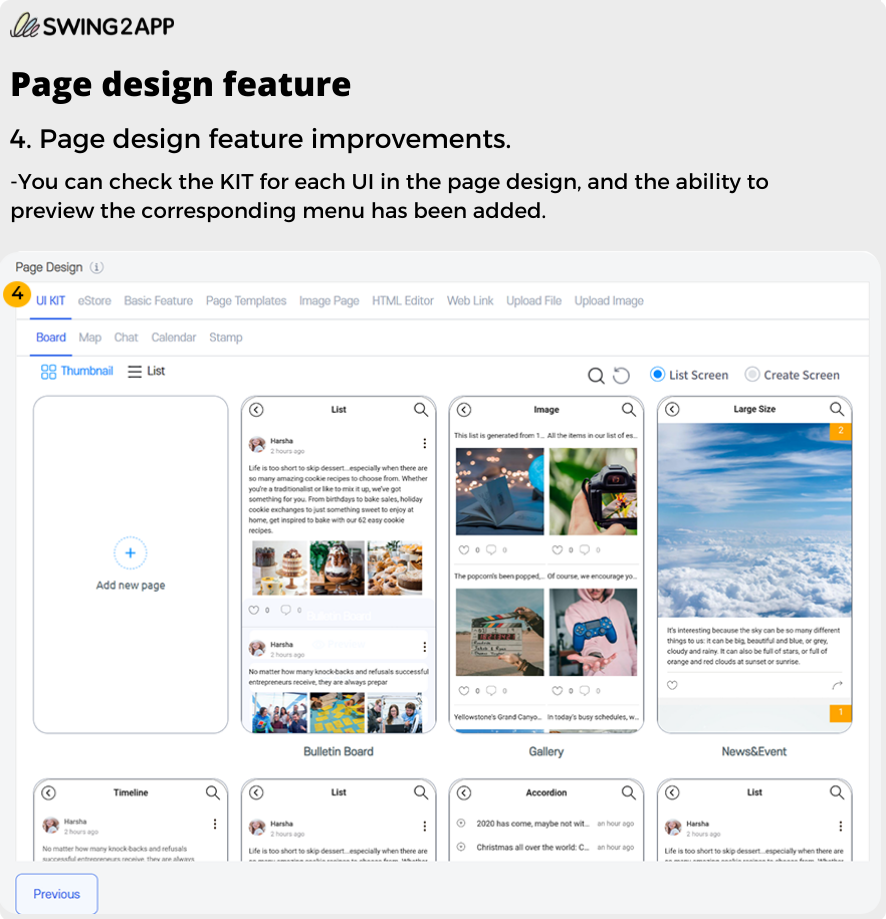
4) Improved page design function
To make it easier to see what kind of screen it is when you select a page from the menu, we have prepared a photorealistic template for each UI.
If you had difficulty figuring out what style the bulletin board would look like when selecting a bulletin board, check the UI-specific KIT in the updated version and apply it to the menu.
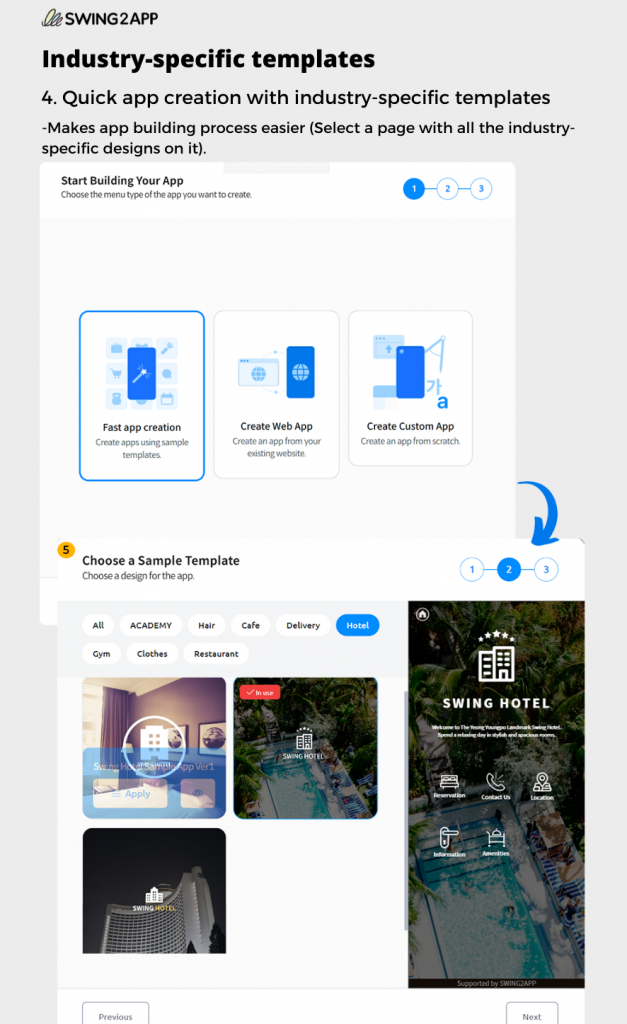
5) Link Wizard and Menu preview feature added in the Pages menu.
Before building an app, you can choose which type of app you want to create.
If you create an app using a template with all designs pre-applied, you can quickly create an app by selecting an industry-specific template.
More Template styles will be added continuously in the Swing2App Maker V3.
Introduction of the new push app features
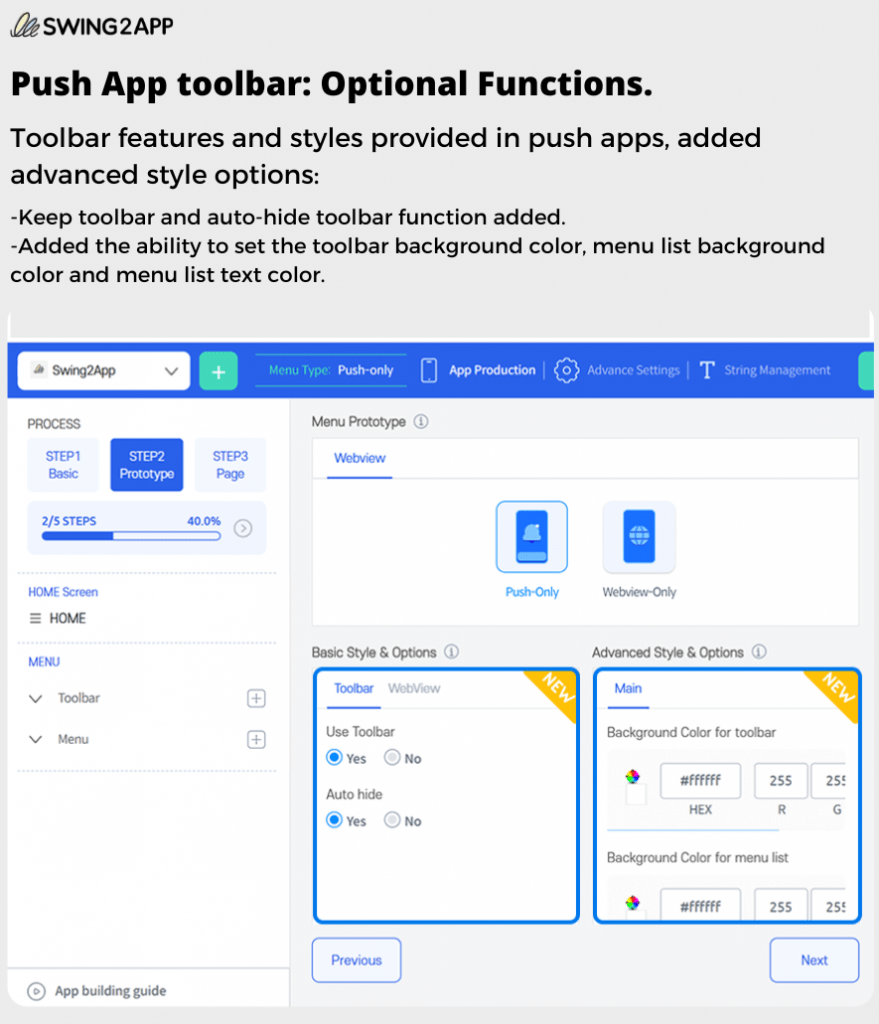
1) Added a push app toolbar option function
Toolbar options provided in push apps have been added in version V3.
(1) You can choose whether the toolbar is used or not, and we also added a function to automatically hide the toolbar.
(2) Advanced style: You can change the background color of the toolbar, and you can freely change the background color and menu text color in the menu area.
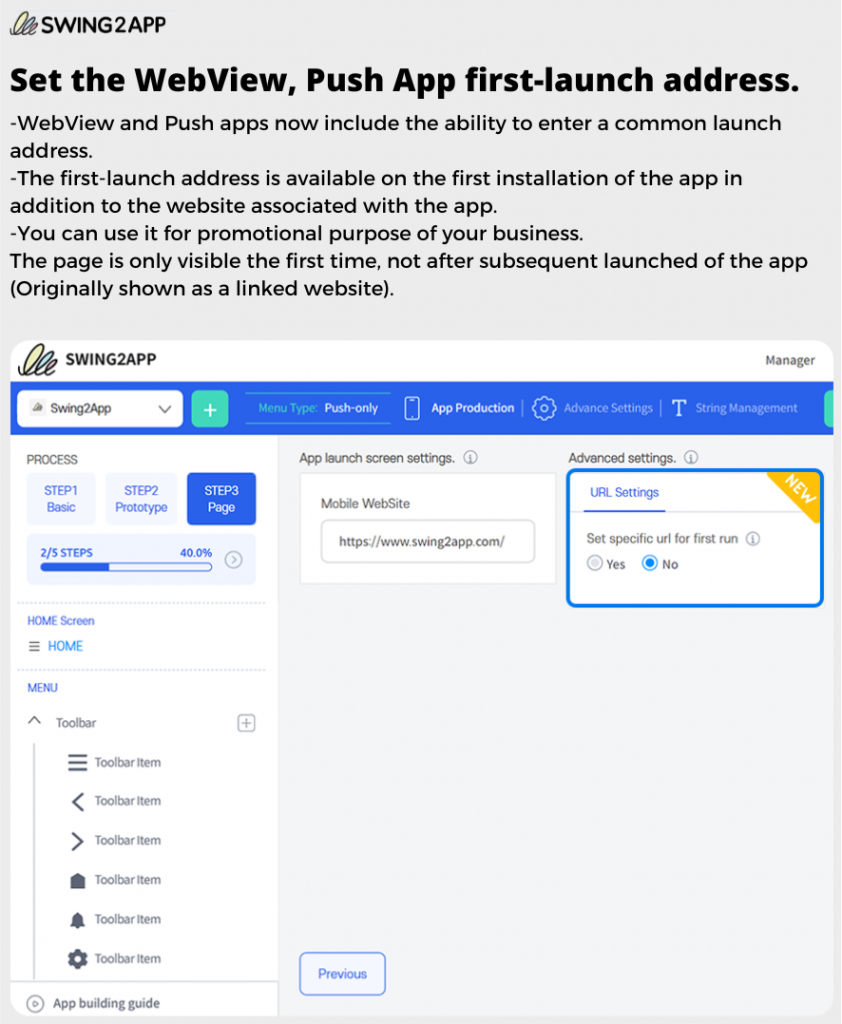
2) Set the WebView, push app first launch address
As a common add-on for web view and push apps, the ability to enter the address of the first launch has been added.
The initial launch address refers to installing the app and applying a page that is displayed only for the first time in addition to the website connected to the app.
You can usually use it for promotional purposes so that you can install and use the app a lot.
This page is only shown for the first time and is not shown when the app is re-launched after that. (Shown as the original linked website)
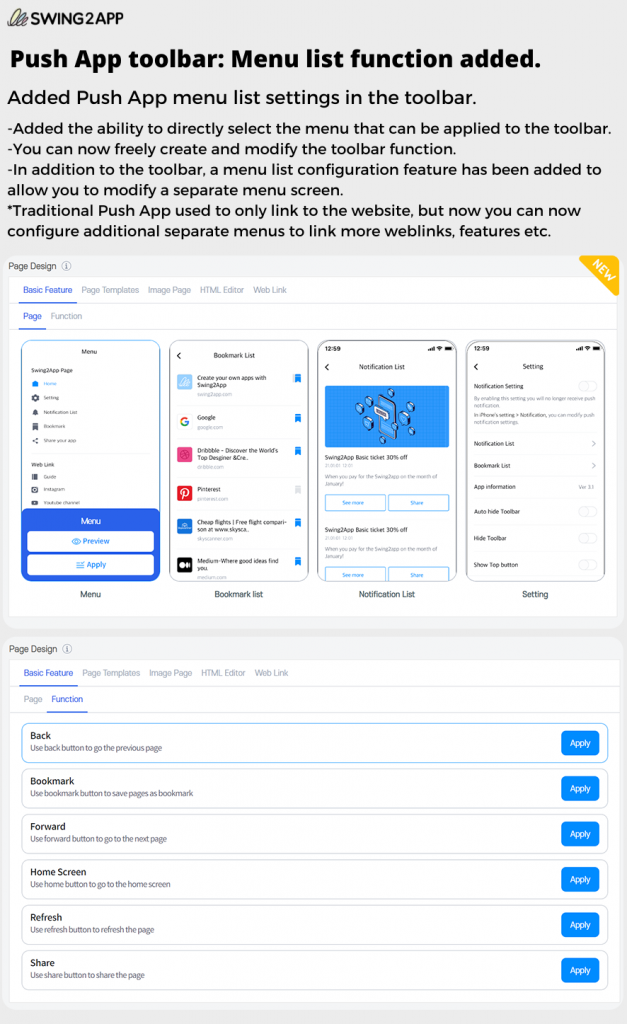
3) Push app menu list setting and toolbar function added
A function that allows you to directly select a menu that can be applied to the toolbar has been added.
In the pinned toolbar function, you can now freely position the toolbar and modify it.
In addition to the toolbar, a menu list setting function has been added so that a separate menu screen can also be configured.
In the existing push app, which only linked to a website, you can now configure a separate menu to connect additional web links and more.
So, that’s all for now!
We will continue to update the app creation features on a regular basis.
Soon, the app operation menu will also be updated and released with new functions one by one.
There will be several releases of the V3 app creation manual and guide, so please be patient and excited as you wait.
Thank you.
